はじめに
前回の記事の続きとなります。
https://www.skyarch.net/blog/?p=18253
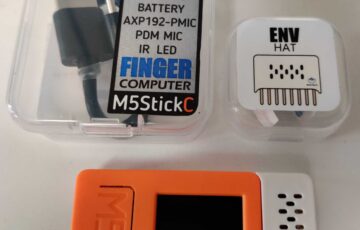
このご時世でZoomを繋ぎっぱなしで作業しているのですが、離席中・別MTG参加中の状況を発信するため、M5Stackを活用してみる事にしました。
検索してみると、SlackのLegacyAPITokenを利用した例が多いのですが
2020年5月5日以降には新規作成出来なくなるようなので、めんどうですがSlack Appを作成して実施してみました。
Legacy Tokenについて
https://api.slack.com/legacy/custom-integrations/legacy-tokens
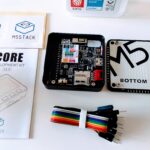
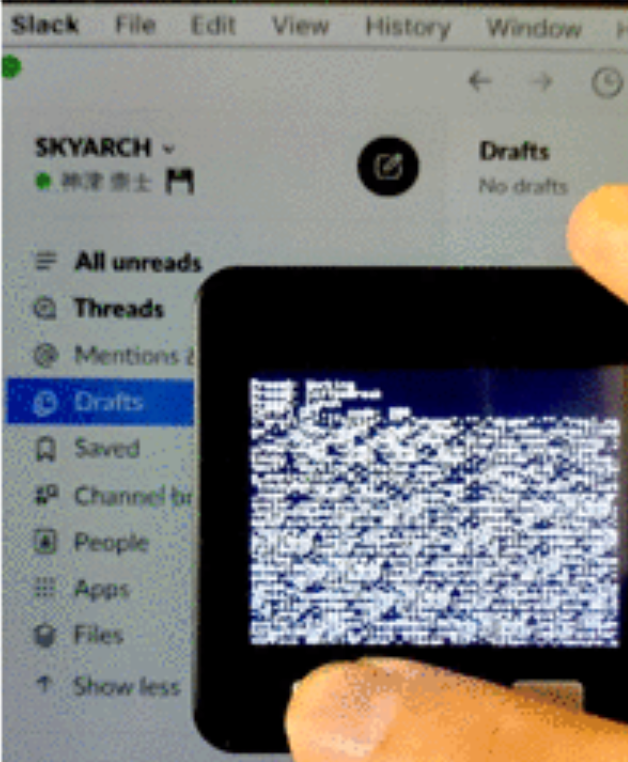
出来上がった物
予めButtonに割り当てた文言/emojiアイコンがSlack画面上に反映されます。
コード中の下記となります。
UpdateSlackStatus("Working", ":floppy_disk:");
目次
手順の概要
- SlackAppの作成
- Curlコマンドで動作確認
- ArduinoJsonのインストール(ArduinoIDE上)
- コード編集
- 実機確認
手順
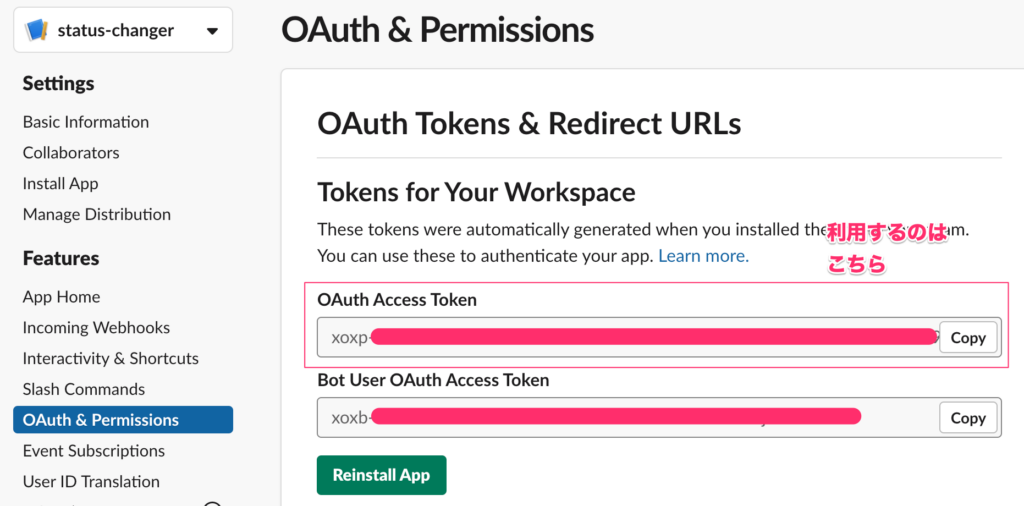
SlackAppの作成
適当な名前でSlackAppを作成し、下記権限を与えます。
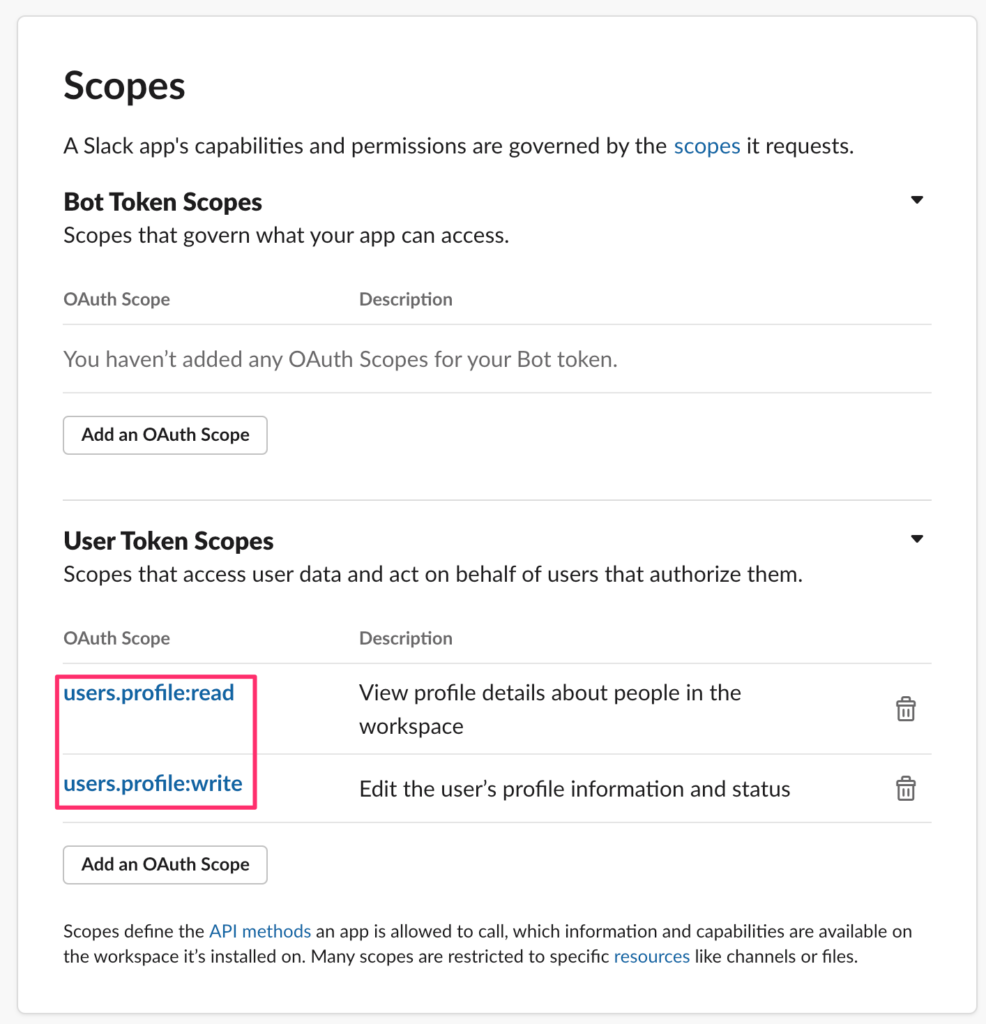
こちらのTokenを利用します。
Curlコマンドで動作確認
手始めにgetから
|
1 2 3 |
$ curl "https://slack.com/api/users.profile.get" \ > -H 'Authorization: Bearer [xoxp-で始まるToken]' {"ok":true,"profile":{"title":"","phone":"","skype":"","real_name":"\u795e\u6d25 \u5d07\u58eb","real_name_normalized":"\u795e\u6d25 \u5d07\u58eb","display_name":"kouzu \u795e\u6d25 \u5d07\u58eb","display_name_normalized":"kouzu \u795e\u6d25 \u5d07\u58eb","fields":[],"status_text":"Working","status_emoji":":floppy_disk:","status_expiration":0... |
postしてみる
|
1 2 3 4 5 6 |
$ curl -X POST -H "Content-type: application/json; charset=utf-8" \ > -H 'Authorization: Bearer [xoxp-で始まるToken]' \ > -d '{"profile":{"status_text":"Working", "status_emoji":":floppy_disk:", "status_expiration":0}}' \ > "https://slack.com/api/users.profile.set" {"profile":{"title":"","phone":"","skype":"","real_name":"\u795e\u6d25 \u5d07\u58eb","real_name_normalized":"\u795e\u6d25 \u5d07\u58eb","display_name":"kouzu \u795e\u6d25 \u5d07\u58eb","display_name_normalized":"kouzu \u795e\u6d25 \u5d07\u58eb","fields":[],"status_text":"Working","status_emoji":":floppy_disk:","status_expiration":0... |
すんなり行きました、後はこれをM5Stackから叩けば良さそうです。
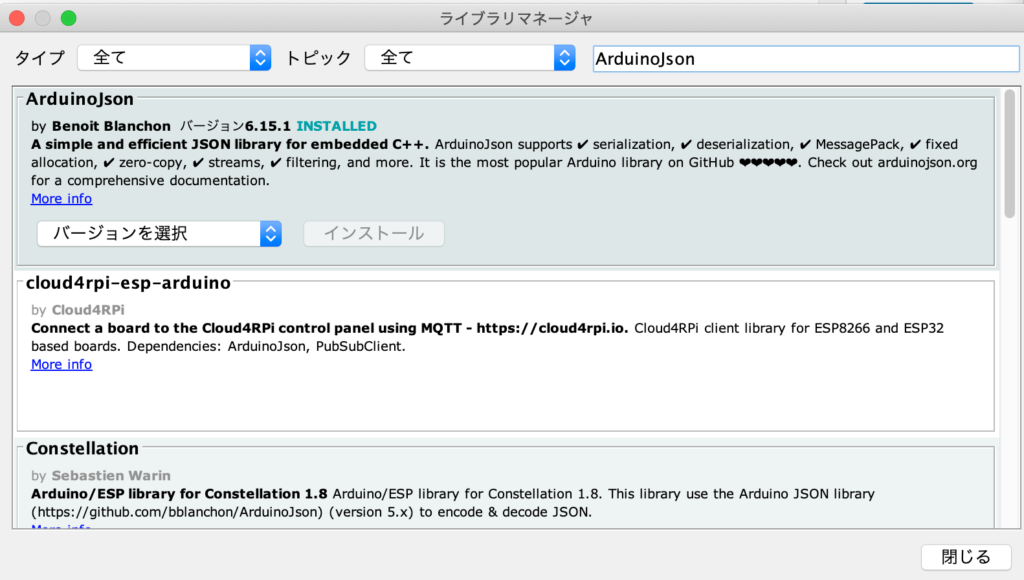
ArduinoJsonのインストール
ArduinoIDEを開き、下記メニューからArduinoJsonをインストール
スケッチ > ライブラリをインクルード > ライブラリの管理
コード編集
|
1 2 3 4 5 6 7 8 9 10 11 12 13 14 15 16 17 18 19 20 21 22 23 24 25 26 27 28 29 30 31 32 33 34 35 36 37 38 39 40 41 42 43 44 45 46 47 48 49 50 51 52 53 54 55 56 57 58 59 60 61 62 63 64 65 66 67 68 69 70 71 72 73 74 75 76 77 78 79 80 81 82 83 84 85 86 87 88 89 90 91 92 93 94 95 96 97 98 99 100 101 102 103 104 105 106 107 108 109 110 111 |
#include <Arduino.h> #include <ArduinoJson.h> #include <WiFi.h> #include <WiFiMulti.h> #include <HTTPClient.h> #include <M5Stack.h> // Wifi Settings #define WIFI_SSID "[ご自身の環境のWifiSSID]" #define WIFI_PASS "[ご自身の環境のWifiPassowrd]" // Slack OAuth Access Token #define TOKEN "Bearer [ご自身のSlackAppのxoxp-で始まるToken]" #define SLACK_ENDPOINT "https://slack.com/api/users.profile.set" const char* ca = \ "-----BEGIN CERTIFICATE-----\n" \ "MII...\n" \ // CAの中身については、M5Stack/M5StickのBasicHTTPClientスケッチ等から取得下さい "-----END CERTIFICATE-----\n"; WiFiMulti wifiMulti; HTTPClient http; char buffer[255]; void InitializeLcd() { // text print M5.Lcd.fillScreen(BLACK); M5.Lcd.setCursor(0, 10); M5.Lcd.setTextColor(WHITE); M5.Lcd.setTextSize(1); // Menu M5.Lcd.printf("PressA: Working\n"); M5.Lcd.printf("PressB: CoffeeBreak\n"); M5.Lcd.printf("PressC: MTG\n"); } void UpdateSlackStatus(String text, String emoji) { // CLS InitializeLcd(); // wait for WiFi connection if((wifiMulti.run() == WL_CONNECTED)) { HTTPClient http; //HTTPS http.begin(SLACK_ENDPOINT, ca); http.addHeader("Content-Type", "application/json"); http.addHeader("Authorization", TOKEN); // create JSON DynamicJsonDocument doc(1024); JsonObject profile = doc.createNestedObject("profile"); profile["status_text"] = text; profile["status_emoji"] = emoji; profile["status_expiration"] = "0"; serializeJson(doc, buffer, sizeof(buffer)); // start connection and send HTTP header int httpCode = http.POST((uint8_t*)buffer, strlen(buffer)); // httpCode will be negative on error if(httpCode > 0) { // HTTP header has been send and Server response header has been handled M5.Lcd.printf("[HTTP] GET... code: %d\n", httpCode); if(httpCode == HTTP_CODE_OK) { String payload = http.getString(); M5.Lcd.println(payload); } } else { M5.Lcd.printf("[HTTP] GET... failed, error: %s\n", http.errorToString(httpCode).c_str()); } http.end(); } } // the setup routine runs once when M5Stack starts up void setup() { // initialize the M5Stack object M5.begin(); dacWrite(25, 0); // Speaker Off InitializeLcd(); /* Power chip connected to gpio21, gpio22, I2C device Set battery charging voltage and current If used battery, please call this function in your project */ M5.Power.begin(); // WifiSetup wifiMulti.addAP(WIFI_SSID, WIFI_PASS); } // the loop routine runs over and over again forever void loop(){ // update button state M5.update(); // Button Pressed if (M5.BtnA.wasReleased()) { M5.Lcd.print('Working'); UpdateSlackStatus("Working", ":floppy_disk:"); } else if (M5.BtnB.wasReleased()) { M5.Lcd.print('CoffeeBreak'); UpdateSlackStatus("CoffeeBreak", ":java:"); } else if (M5.BtnC.wasReleased()) { M5.Lcd.print('MTG'); UpdateSlackStatus("Meating", ":writing_hand:"); } } |
ボタン押下イベントを割り込みで取ろうと考えておりましたが、簡易版に...
参考URL
SlackでユーザーStatusを設定する
User presence and status
https://api.slack.com/docs/presence-and-status#user_presence
users.profile.get
https://api.slack.com/methods/users.profile.get#arg_token
M5Stick-CでJsonをPOSTする
https://qiita.com/poruruba/items/4bf6a52520e431a8f4a5
ArduinoJsonでNestedObjectを作成
https://arduinojson.org/v6/api/jsondocument/createnestedobject/
実機確認
ArduinoIDEにて、検証⇢マイコンボードへ書き込みを実行します。
まとめ
次回はMQTTでAWSIoTとお喋りしてみたいと考えております。
投稿者プロフィール
-
Japan AWS Ambassadors 2023, 2024
開発会社での ASP型WEBサービス企画 / 開発 / サーバ運用 を経て
2010年よりスカイアーチネットワークスに在籍しております
機械化/効率化/システム構築を軸に人に喜んで頂ける物作りが大好きです。
最新の投稿
 Amazon Q2025年6月11日Amazon Q Developer CLI でMCPサーバ起動に失敗したのでトラブルシュートしてもらった
 AWS2025年2月25日WebスクレイピングにAmazon CloudWatch Synthetics CanaryとBedrockを利用する
 AWS re:Invent 20242025年1月1日AWS re:Invent 2024から読み解く、次世代クラウドコンピューティングの潮流
 AWS re:Invent 20242024年12月7日Bedrock Flows と Amazon Q Developer Agentの新機能で生成AIアプリを短時間で作成する