Amazon Echo Dotにて弊社ブログの投稿数を取得するAmazon Echo(dot)用のcustom skillを作成します。
- 開封の義
- Amazon Echo Dot初期設定編
- Amazon DeveloperConsoleを有効化
- Lambda function作成 <- 今回はこちら
- Amazon DeveloperConsoleよりAlexa Skillを登録
※Amazon EchoやAmazon Tap, Echo dotは日本の技適を通っていませんので、日本国内での利用は行なえません、ご注意下さい
今回の記事では、custom skill作成例として弊社ブログ記事の投稿数を取得 -> 発話を行います。
Amazonの提供しているサンプルコードをベースとした、わかりやすい動作概要解説につきまして最下段に記載のリンク先を参考にさせて頂きました。
対象として利用出来るブログシステム
WordPressにJSON API pluginがインストール済みで、Core(get系の機能)が有効化されているもの
(何らかのJsonを返してくれるAPIであれば比較的簡単な修正で対応出来ると思います)
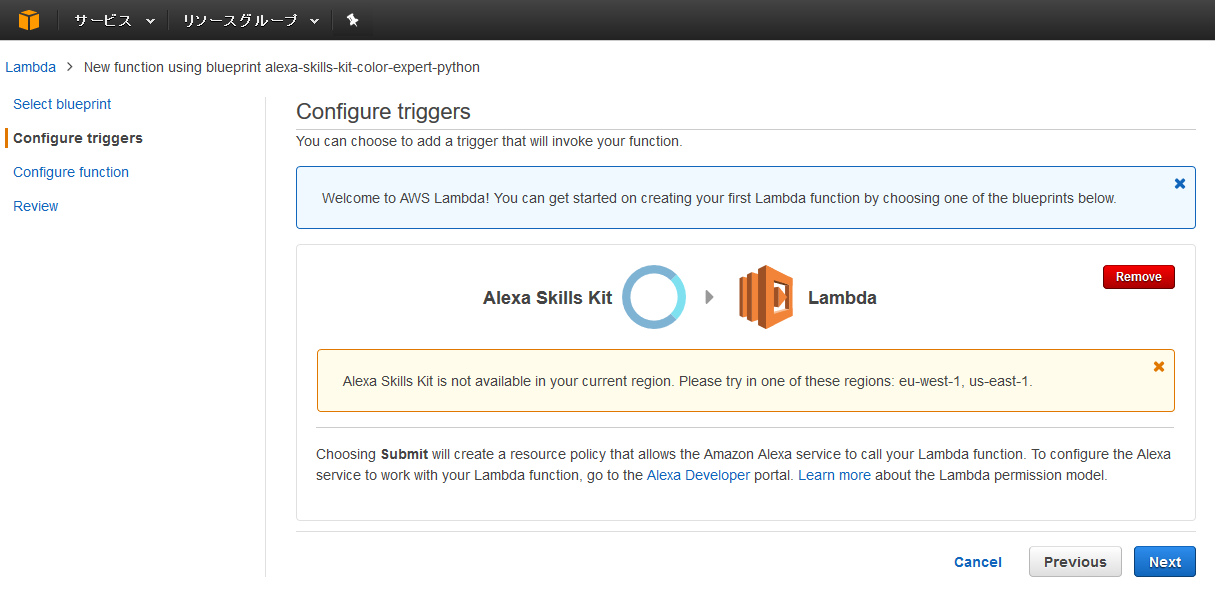
※作成を進める上で警告が出ますが、リージョンをeu-west1 もしくは us-east1(バージニア北部) にて実施する必要があります。
新規Lambda functionの作成
Select blueprint
AWSマネジメントコンソールにログイン後、Lambdaを選択して下さい。
blueprintとして 「alexa-skills-kit-color-expert-python」を選択しますが、数が多いため Filter に 「alexa」と入力すると選択が楽です。

Configure triggers
Alexa Skills Kit を選択します。
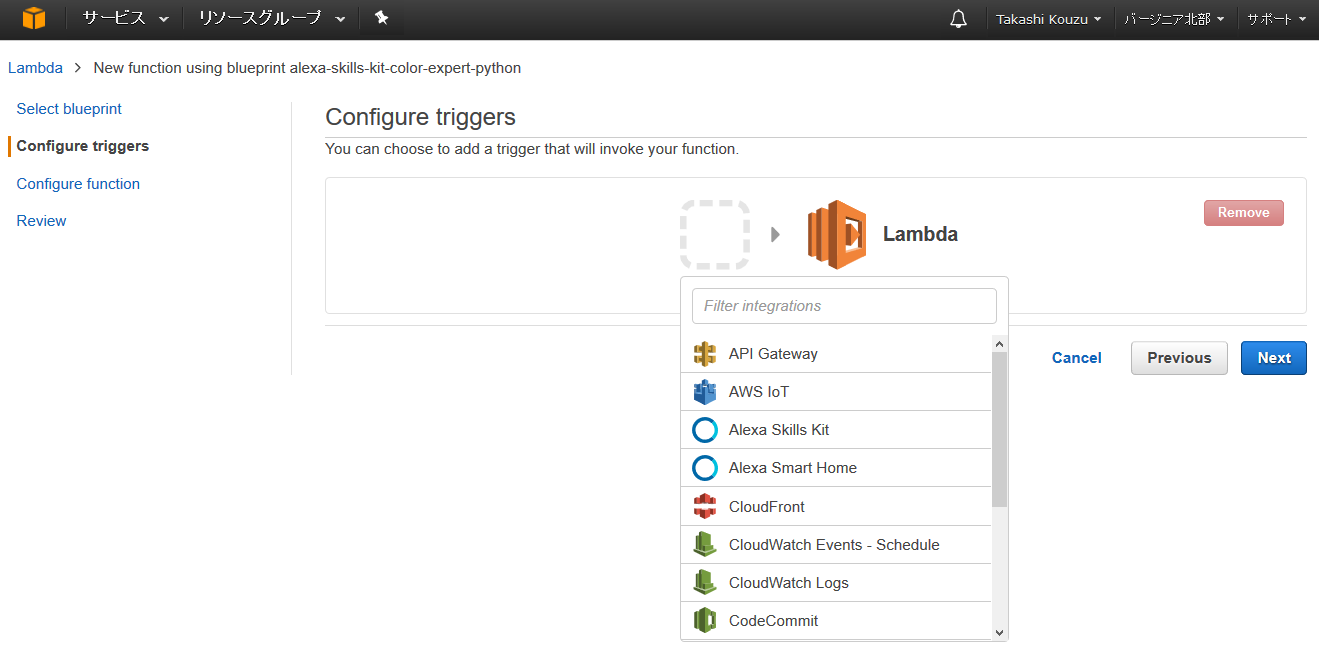
ここで選択後、下記のような画面となる場合はリージョンを再設定し初めから実行して下さい。
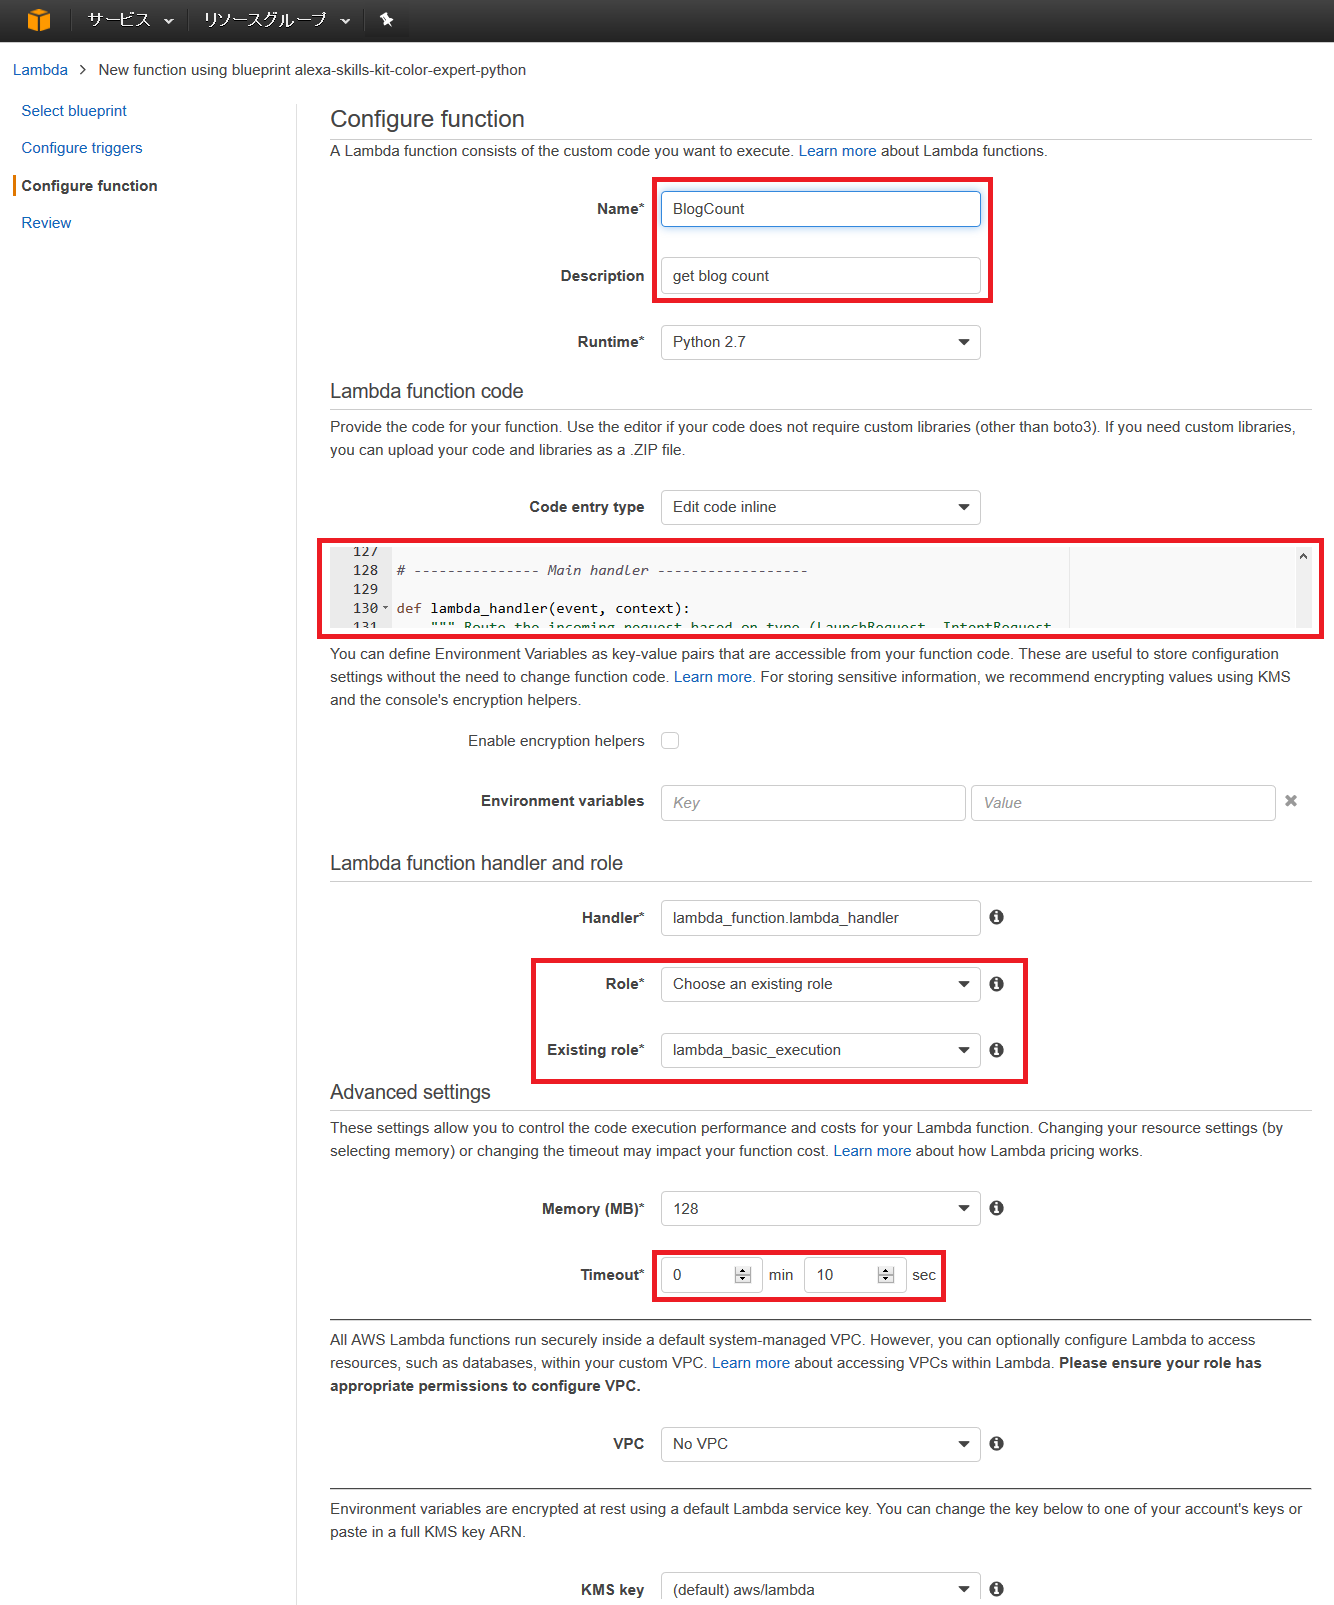
Configure function
こちらでコードと動作設定を行います、コードは下段に記載しております。
入力項目
- Name, Description : 任意の名前を入力
- Lambda function code : 最下段に記載のコードを入力
- Lambda funtcion handler role : 既に存在する lambda_basic_execution を指定します
下記に記載しておりますが、存在しない場合「Create a custom role」を選択するとIAM管理画面が開き、作成を半自動で行えます。 - Timeout : APIリクエストの返却される時間に余裕を持った秒数を選択します、こちらでは10秒を指定しています。
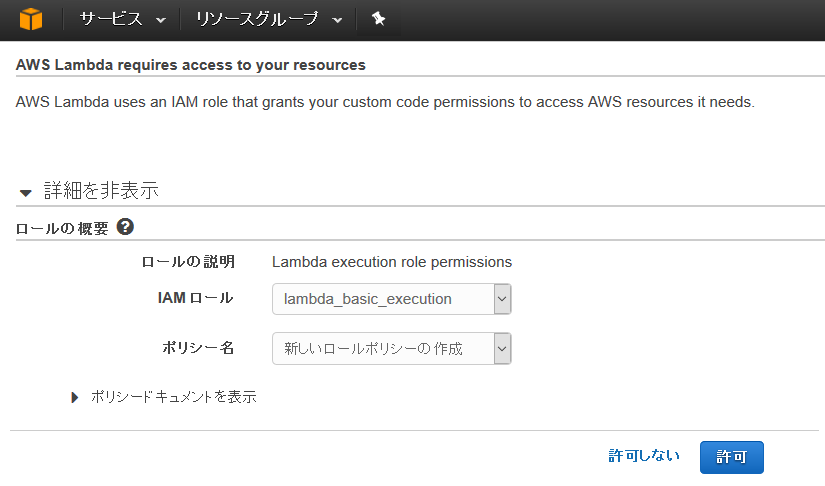
IAMロールの半自動生成
Create a custom role を選択後、自動で開かれたIAM管理画面にて許可を押すとRoleが生成されます。
Lambdaコード
ほぼblueprintですが、追加・変更・削除した部分は下記となります。
ロジックについては、外部URLを叩き取得したJSONをパースしているのみです。
- 削除
もともと持っているサンプルとしての機能、関数部分を削除 - 変更
on_intent 中の intent_name を変更 - 追加
先頭部分 DATE / URLを追加
get_blog_count() 関数を追加
コード全体
※URI部分を自身のWordpress+JSON API導入済みのWebサイト等に変更しなければ動作しません。
"""
return BlogCount from WordPress (using JSON API plugin)</p>
<p>Based on <a href="http://amzn.to/1LzFrj6">http://amzn.to/1LzFrj6</a>
"""</p>
<p>from <strong>future</strong> import print_function
from urllib2 import urlopen
import json
import time</p>
<p>DATE = time.strftime("%Y%m%d")
URI = '<a href="https://URL_OF_YOUR_BLOG/?json=get_date_posts&amp;date">https://URL_OF_YOUR_BLOG/?json=get_date_posts&date</a>=' + DATE</p>
<h1>--------------- Helpers that build all of the responses ----------------------</h1>
<p>def build_speechlet_response(title, output, reprompt_text, should_end_session):
return {
'outputSpeech': {
'type': 'PlainText',
'text': output
},
'card': {
'type': 'Simple',
'title': "SessionSpeechlet - " + title,
'content': "SessionSpeechlet - " + output
},
'reprompt': {
'outputSpeech': {
'type': 'PlainText',
'text': reprompt_text
}
},
'shouldEndSession': should_end_session
}</p>
<p>def build_response(session_attributes, speechlet_response):
return {
'version': '1.0',
'sessionAttributes': session_attributes,
'response': speechlet_response
}</p>
<h1>--------------- Functions that control the skill's behavior ------------------</h1>
<p>def get_welcome_response():
""" If we wanted to initialize the session to have some attributes we could
add those here
"""</p>
[crayon-69b4d6c9f1c5a720994491/]
<p>def handle_session_end_request():
card_title = "Session Ended"
speech_output = "Thank you for trying Blog articles counter!"</p>
[crayon-69b4d6c9f1c5e364632506/]
<p>def get_blog_count():
card_title = "Blog articles counter"
session_attributes = {}</p>
[crayon-69b4d6c9f1c5f408434821/]
<h1>--------------- Events ------------------</h1>
<p>def on_session_started(session_started_request, session):
""" Called when the session starts """</p>
[crayon-69b4d6c9f1c60682127926/]
<p>def on_launch(launch_request, session):
""" Called when the user launches the skill without specifying what they
want
"""</p>
[crayon-69b4d6c9f1c61021385930/]
<p>def on_intent(intent_request, session):
""" Called when the user specifies an intent for this skill """</p>
[crayon-69b4d6c9f1c62625724390/]
<p>def on_session_ended(session_ended_request, session):
""" Called when the user ends the session.</p>
[crayon-69b4d6c9f1c63539633596/]
<h1>--------------- Main handler ------------------</h1>
<p>def lambda_handler(event, context):
""" Route the incoming request based on type (LaunchRequest, IntentRequest,
etc.) The JSON body of the request is provided in the event parameter.
"""
print("event.session.application.applicationId=" +
event['session']['application']['applicationId'])</p>
[crayon-69b4d6c9f1c64858049969/]
<p>
テスト
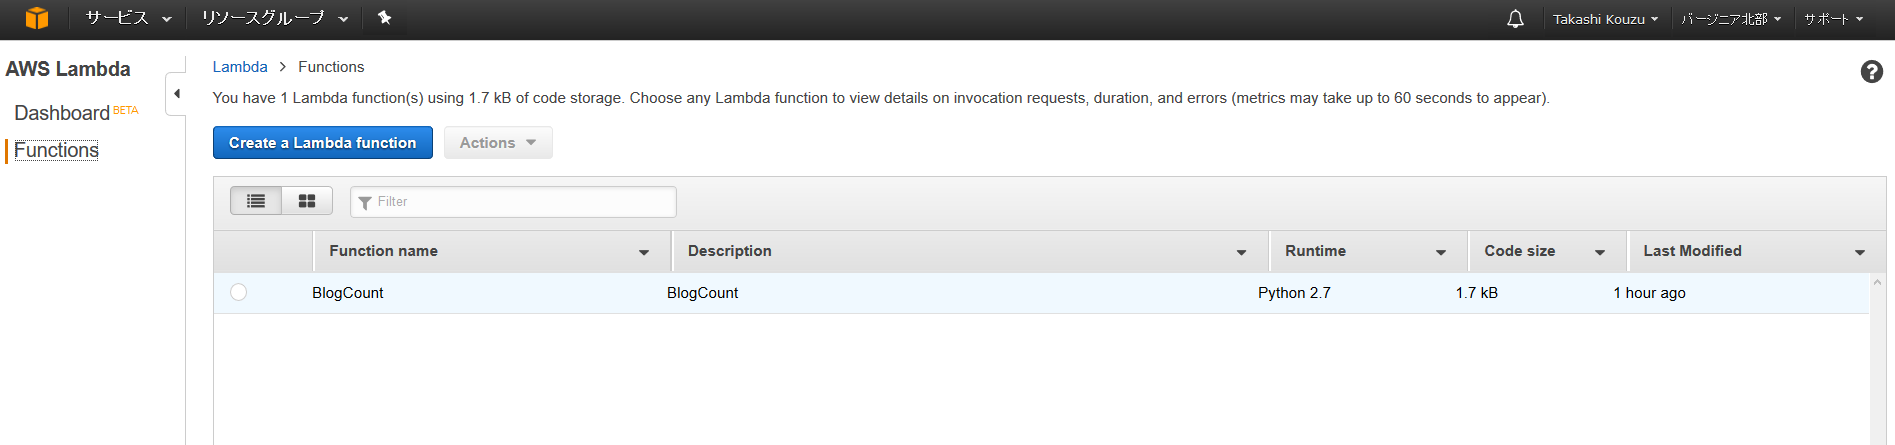
登録したLambda functionが適切に動作するかテストします。
作成したLambda functionを選択
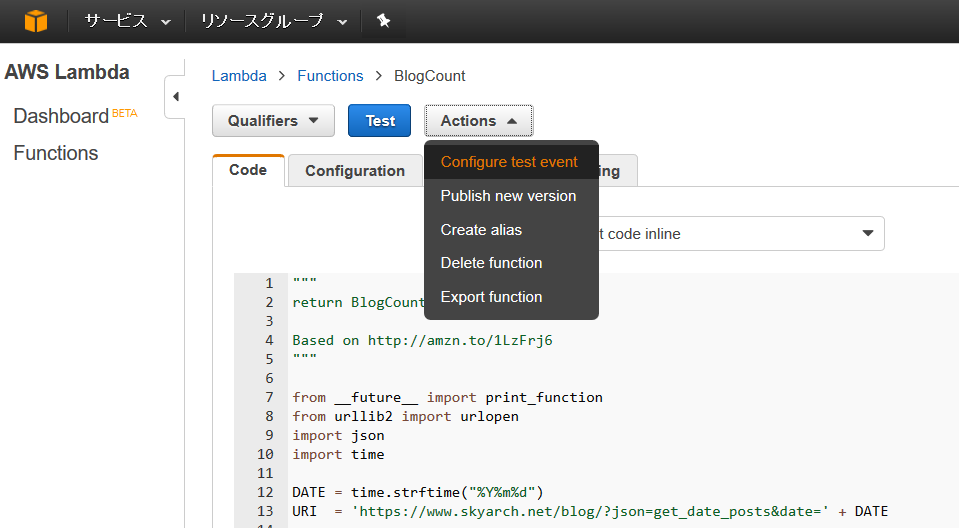
Configure test event イベント指定Windowを開く
発行するイベントを入力
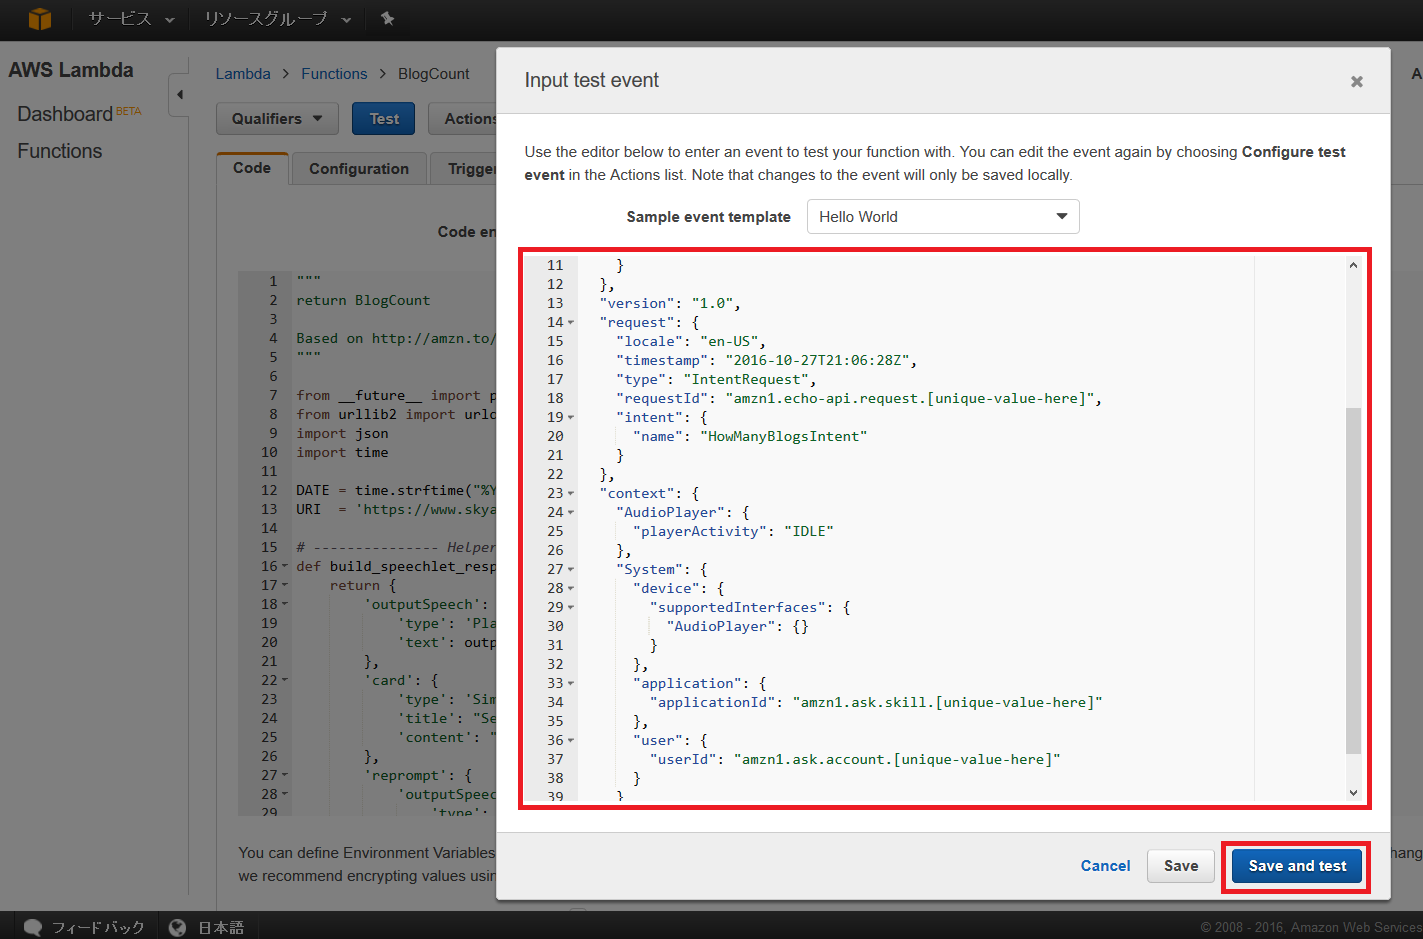
intent name を HowManyBlogsIntent として Lambda functionを呼び出し結果を取得・表示するための物です。
|
1 2 3 4 5 6 7 8 9 10 11 12 13 14 15 16 17 18 19 20 21 22 23 24 25 26 27 28 29 30 31 32 33 34 35 36 37 38 39 40 41 |
{ "session": { "new": false, "sessionId": "amzn1.echo-api.session.[unique-value-here]", "attributes": {}, "user": { "userId": "amzn1.ask.account.[unique-value-here]" }, "application": { "applicationId": "amzn1.ask.skill.[unique-value-here]" } }, "version": "1.0", "request": { "locale": "en-US", "timestamp": "2016-10-27T21:06:28Z", "type": "IntentRequest", "requestId": "amzn1.echo-api.request.[unique-value-here]", "intent": { "name": "HowManyBlogsIntent" } }, "context": { "AudioPlayer": { "playerActivity": "IDLE" }, "System": { "device": { "supportedInterfaces": { "AudioPlayer": {} } }, "application": { "applicationId": "amzn1.ask.skill.[unique-value-here]" }, "user": { "userId": "amzn1.ask.account.[unique-value-here]" } } } } |
結果確認
コントロールパネル下段のExecution resultにresponseとしてoutputSpeechに 「XX Blog posts Today」と表示されればテストOKです!
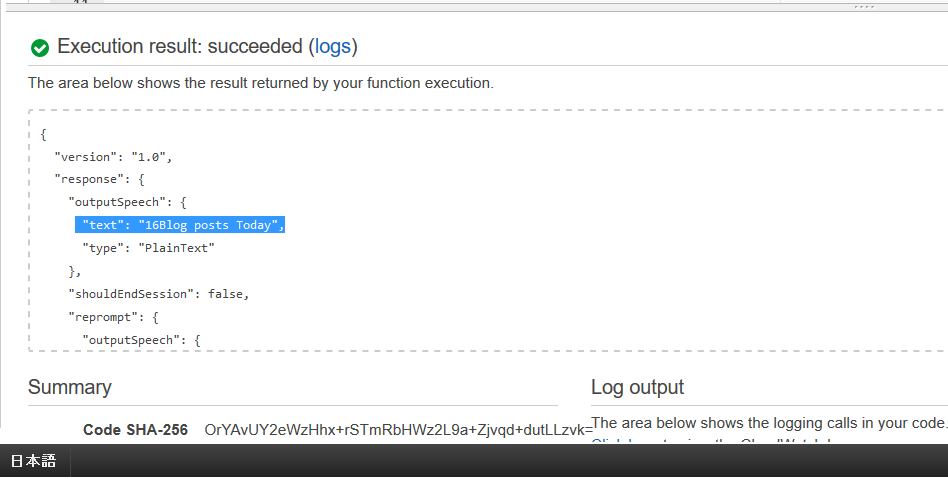
※こちらの内容をAmazon echo (dot)が喋ります
次回はいよいよAlexa Skillを登録し、Amazon echo (dot)を喋らせましょう!
この連載を通じて出来上がるもの
単独で動作しますが、自分の発音の英語を5回に1度程しか聞き取ってくれないため(悲)、PCにて喋らせております。
PC - 「Alexa, ask blog get count」
Amazon Echo Dot - 「16 Blog posts Today」
この間に自分の作成したLambda funtcionを通っていると考えると感激モノですね!
動作概要解説で参考にさせて頂いたページ
- AlexaスキルとLambdaファンクションはどのように連携しているか
http://blog.algolab.jp/post/2016/09/28/alexa-color-expert/ - AWS Lambdaを使ってAmazon Echoに機能追加してみた
http://dev.classmethod.jp/etc/alexa-skill-with-lambda-sample/
公式ドキュメント
- Creating an AWS Lambda Function for a Custom Skill
https://developer.amazon.com/public/solutions/alexa/alexa-skills-kit/docs/developing-an-alexa-skill-as-a-lambda-function
投稿者プロフィール

-
Japan AWS Ambassadors 2023, 2024
開発会社での ASP型WEBサービス企画 / 開発 / サーバ運用 を経て
2010年よりスカイアーチネットワークスに在籍しております
機械化/効率化/システム構築を軸に人に喜んで頂ける物作りが大好きです。