How to connect on your Azure Virtual Machine with Remote PowerShell?
First we need to know where is your Azure Virtual Machine public powershell endpoint. In my previous blog, creating Azure Virtual Machine with powershell, I update the powershell endpoint into 5986. however, to find this in Azure Management Portal, just login, select your Virtual Machine and click the “Endpoints” tab.

I created a script on how to connect Azure Virtual Machine with Remote PowerShell which makes a lot easier to setup your VM. Below is the powershell cmdlets I used.
0. Your global variables.
$SubscriptionName = "SUBSCRIPTION NAME"
$DNSName = "VM DNS NAME"
$VMName = "VM NAME"
$VMUser = "VM USER"
$VMPassword = "VM PASSWORD"
To get your $SubscriptionName, type in your powershell console
(Get-AzureSubscription).SubscriptionName
1. Add Azure Account Details.
# The cmdlets need your subscription so they can manage your services.
Add-AzureAccount
Set-AzureSubscription -SubscriptionName $SubscriptionName
2. Create a certificate.
Remote Powershell uses HTTPS and the certificate used for your Virtual Machine is a self signed certificate. So, download and install generated certificate into your local certificate store which allows powershell to verify it is communicating with the correct endpoint.
$WinRMCert = (Get-AzureVM -ServiceName $CloudServiceName -Name $Name | select -ExpandProperty vm).DefaultWinRMCertificateThumbprint
$AzureX509cert = Get-AzureCertificate -ServiceName $CloudServiceName -Thumbprint $WinRMCert -ThumbprintAlgorithm sha1
$certTempFile = [IO.Path]::GetTempFileName()
$AzureX509cert.Data | Out-File $certTempFile

If ((Test-Path Cert:\LocalMachine\Root\$winRMCert) -eq $false)
{
	$CertToImport = New-Object System.Security.Cryptography.X509Certificates.X509Certificate2 $certTempFile
	$store = New-Object System.Security.Cryptography.X509Certificates.X509Store "Root", "LocalMachine"
	$store.Open([System.Security.Cryptography.X509Certificates.OpenFlags]::ReadWrite)
	$store.Add($CertToImport)
	$store.Close()
	Remove-Item $certTempFile
}
3. Connect to your Azure VM.
$nVMPassword= convertto-securestring -AsPlainText -Force -String $VMPassword
$credential = new-object -typename System.Management.Automation.PSCredential -argumentlist $VMUser,$nVMPassword
Enter-PSSession -ComputerName $DNSName".cloudapp.net" -Port 5986 -Credential $credential -UseSSL
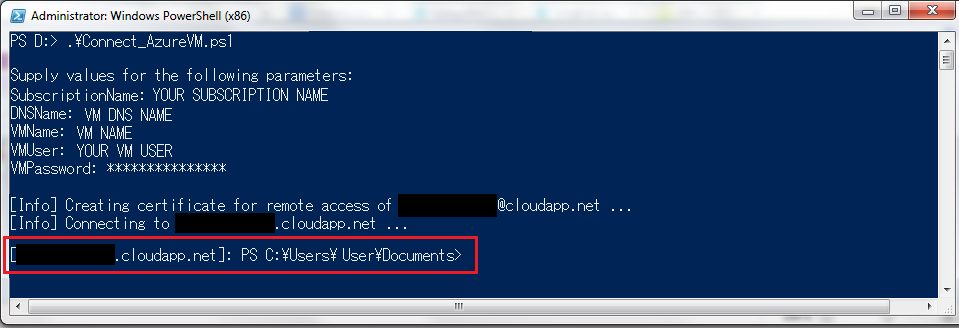
You are good to go!. Here how I run my script.
Run PowerShell console as Administrator
type Set-ExecutionPolicy RemoteSigned -Force
then .\Connect_AzureVM.ps1
Once you are connected. You can configure now your Virtual Machine. For example installing and configuring Windows Roles, Features, and Services all the way to downloading and deploying an application or website, executing cookbooks, and etc.
See my next blog post on how to execute chef-solo on your Windwos Azure Virtual Machine.